How to Use Trim and Doors to Update Your Home
/
Do you daydream about a complete gut and redo of your entire house, but it's just not in the budget to do that? Take a look around your home. Do you think there are areas that could use a little updating or refreshing? Do some spaces in your home look a little bland and boring? By updating your interior doors or changing out or adding trim to certain areas of your home, you can change the entire appearance of a room. We'll explore some of the best and most inexpensive ways to update your home using trim and doors.
Prefer to listen?
Doors
Upgrading your front entrance door will transform the curb appeal of your home. The front door of your home is usually the first thing people will notice, and if you've got the budget to upgrade to a new one, then go for it!
What about your interior doors? When my clients don't want to do a complete renovation but still want to update and refresh the look of their homes, one of the first things I often suggest is replacing the interior doors.
Many people are still living with the original builder's-grade interior doors. For some, that might mean the flat mahogany doors. Many homes built in the 1970s had flat stock painted doors. Some of the newer homes will have a more contemporary door, but they will only be builder’s grade six-panel doors. Although all of these doors are functional, they don't add to the beauty of the home, and they definitely don't add texture or interest.

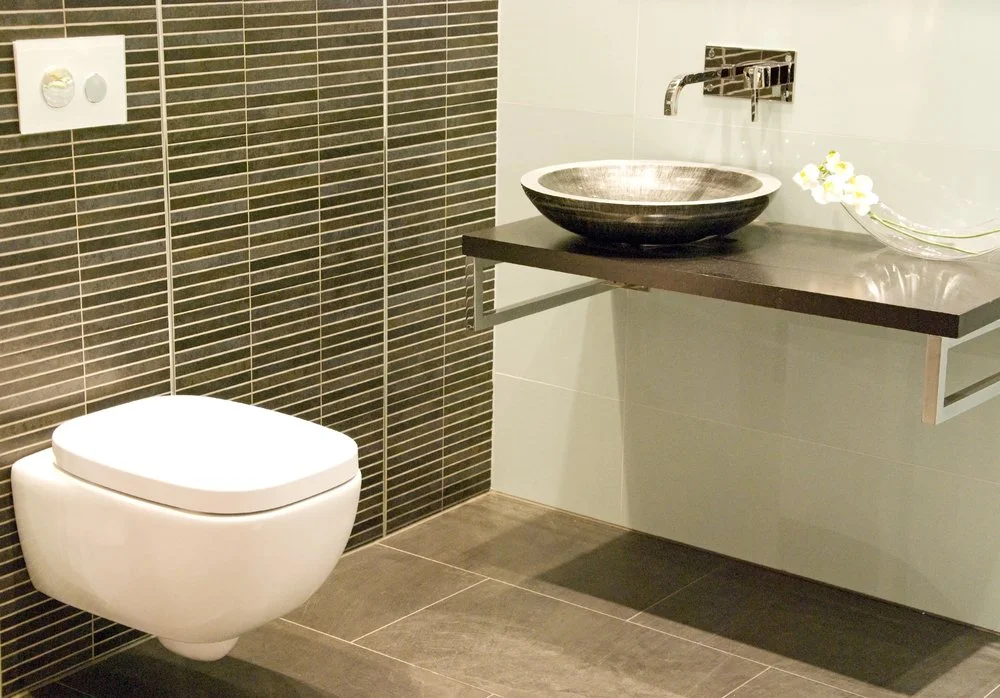
30-in x 80-in Primed 5-Lite White Laminated Glass Interior Slab Door from Lowe's
By upgrading the doors to something with a little more interest and beauty, your space can look completely different. For example, one of my clients wanted to not only put a new entrance door on her bathroom but also find a way to increase the natural light without putting in a larger window. I suggested a frosted glass door like the one you see here. The rest of her home was decorated in a contemporary style, so this door suited the style of her home. It was definitely an upgrade and an improvement over the flat-panel door she had previously.
There are so many doors on the market today that are a drastic improvement over flat-panel or six-panel doors. Check out your local Home Improvement Centre or door manufacturer to see if there's an option that suits you.

We deal with Central Ontario Trim and Don Lea Lumber in the Durham Region area. Here is a gorgeous glass door that we installed for clients when we finished their basement. This door was used at the basement entrance as well as the entrance to the new office that was built within the recently finished basement. The door lets in lots of light and adds a definite touch of elegance to the basement.
Handles
If you're not quite ready to replace all of the doors in your home or it's not in your budget, consider replacing the door handles. This is a very simple and inexpensive task that can often be done as a DIY. I strongly recommend lever handles. Not only do these look a little more contemporary and updated, but they are extremely practical as well.
When I moved into my home 16 years ago, this was one of the first tasks I did. I got rid of all of the gold ball knobs on the doors and installed brushed nickel lever handles.
For me, it was the functionality of this type of handle that sold me on replacing all of my door handles. Countless times I'm carrying a basket full of laundry to the bedroom and only have to use my elbow to open the door to get in. Even when I'm carrying several books or samples into my office, my hands are usually not free to open the door handle. Again, my elbow can quickly open a door that has a lever handle on it. I'm a big believer in function over beauty when it comes to making changes in your home. The benefit of the lever handles is that they offer both.
Crown Molding

You can't go wrong with installing crown molding in just about any room. If your room looks a little plain and needs to be jazzed up a bit, installing some crown molding draws the eye up and definitely adds texture and interest to a room.
There are tons of different crown moldings available. When selecting your crown molding, the best advice I can give is to ensure that the size of the molding corresponds to the size of the room. If the room is only 140 square feet with 8-foot ceilings, you don't want to select a huge crown molding.
Also, make sure that the style you select contrasts well with the style of your home. If your home decor is very classic, timeless, and maybe just a little bit contemporary, you don't want to select an extremely ornate crown molding style.
In Durham Region, we use Peacock Lumber for our crown molding. They have many styles available, including MDF and wood. We strongly recommend using wood instead of MDF, as it is much easier to work with when installing. It also produces a much more professional, clean look.
If you don't have experience installing crown molding, you really need to hire a professional for this job. It is definitely a skill and an art form to install it properly. When you hire a company to do this task, ask for some photos and references of crown molding jobs they’ve done. If not installed properly, it can really look like a mess.
Chair Rail

When we meet with clients, we often see chair rails in their homes. They were traditionally used to protect walls when chairs were backed up from tables. Chair rails were also used as divider strips. You would often see paint below the chair rail and wallpaper above it.
We don't see chair rails being used as often these days in renovations, unless it’s part of wainscoting along a stairwell wall. If you have a chair rail and feel it dates your home, removing it and then skim coating over any damage is very simple to do.
If you don't have chair rails in your home, chair rails can still be used to create a more formal and traditional design if that's what's appropriate for your home. Most often, chair rails will be used in a very formal dining room setting.
Baseboards
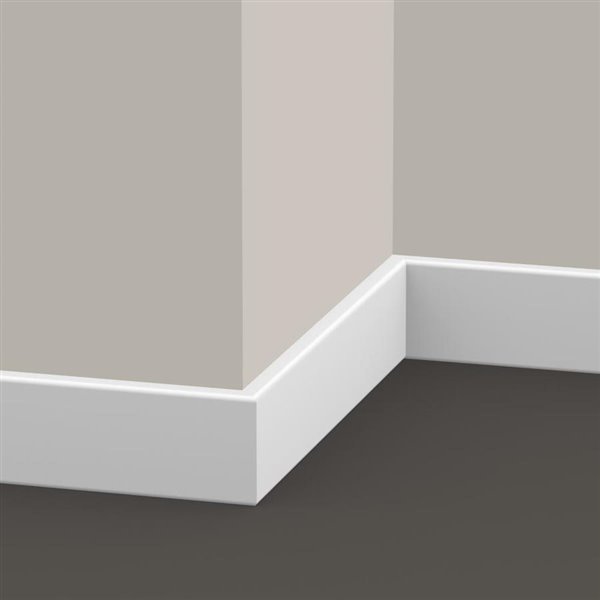
Flat stock baseboard from Lowes.
This is a very common upgrade that we do frequently in our clients' homes. Back in the 70s, 80s, and even into the 90s, homebuilders were often installing tiny baseboards. Some baseboards were even as small as 2 1/2 inches tall. Although our eyes do not often notice baseboards in a room, once you change the baseboards into something more suitable to your home and style, you'll be surprised at the subtle difference it can make.
We frequently remove existing baseboards and replace them with a minimum of 4 1/2-inch-tall baseboards, and in most cases, something 5 1/2-inch-tall or larger. Unless your home suits the style, keep the baseboard design simple. We really like the Old Farm baseboard from Peacock Lumber. It has a very classic and timeless style.
Another option for baseboards that we have started to use much more frequently is flat stock baseboard. This provides a very contemporary, almost modern, look. It is simple, clean, and classic. However, bear in mind that if you're going to put a flat stock baseboard in your home, you really need to consider replacing all of the casing as well. It will look a little off to have flat stock baseboards and a more decorative casing trim around doors and windows.
Decorative Small Trim
If you're reasonably happy with your baseboards or just want to upgrade the look of the current baseboard, one simple and inexpensive option is to utilize a decorative small trim piece.
We frequently see a quarter-round at the bottom of the baseboard. This is a very dated look and adds nothing to the overall style of the home. By replacing that quarter round with a more decorative trim, you easily update and upgrade the look.
Another option is to add a piece of small decorative trim at the top of your existing smaller baseboard. This can take a 3 1/2" or 4" baseboard and turn it into something much larger and more decorative.
We had one client who decided to leave a small space between the top of her existing baseboard and where we placed her small decorative trim. By painting this empty space the same white that we used on her baseboard and trim, it gave the illusion of an extremely large baseboard and gave the room a very elegant, dramatic effect. The room that we did this in was her living room, which had a 16-foot ceiling. It was the perfect look for an otherwise grand room.

Another idea we’ve used a few times with clients is to paint the baseboard (and the casing) in a contrasting colour to the walls. The normal go-to is to paint the trim a shade of white. However, you can really add some interest by introducing a complementary colour. Check out the gorgeous colour of the trim and door in the photo on the right. It contrasts beautifully with the colour on the walls.
Coffered Ceilings
Coffered ceilings are not for everyone, and you definitely need to have an absolute minimum of an 8-foot ceiling in order to have this work. We actually recommend that your ceiling height be 9 or 10 feet in order to create a truly effective look.
We highly recommend consulting with a professional interior designer before deciding to do coffered ceilings. Make sure that it's the right style for your home. An interior decorator will also be able to suggest what type of coffered ceiling to install that will increase the value of your home instead of taking away from what you already have.
In summary…
You don’t always have to complete a big renovation in order to update your home and increase its value. Simple things like upgrading the baseboards or changing some of the interior doors can really improve the look of your home. Take a look around your home and see where you could use some upgrades.
If you’re interested in having some simple upgrades done in your home and you live within the Durham Region area, give us a call at 905-259-3344 or click here to schedule your free consultation. We’d be happy to help!
YOU MIGHT ALSO ENJOY: