7 Tips for Making Your Bathroom Waterproof
/Bathrooms are a sanctuary in our homes, an area we escape to for relaxation and self-care. It's essential that they're kept free of water damage and moisture to ensure they remain a safe space.
Water is present in many areas of our home, but nowhere else gets exposed to as much moisture and water as our bathrooms. While it is normal for water to be constant in a bathroom, it can cause major damage if it happens to infiltrate below surfaces, such as your floors, countertops, or walls. Unfortunately, even the tiniest leak can cause damage to your home’s structure.
This is why waterproofing your bathroom is essential. It is one of the most important steps you can take to ensure your home is safe from water damage and mould. Not only will it help you save money in the long term, but it will also make your bathroom safer and more comfortable to use. With some tips in hand, you can be sure that your bathroom will remain dry and safe for years to come.
Prefer to listen?
1.Seal and Fill All Cracks and Holes

Sometimes minor details have tremendous results. This is definitely the case when it comes to your bathroom.
If you have any cracks, holes, or open seams in your bathroom, they may be causing more damage than you realize. These areas are more susceptible to water damage, considering that moisture and water can easily penetrate them.
A simple solution is to seal these types of openings with caulk. That’s right, some good old caulking can save you plenty in the long run. Do look for waterproof silicone caulking for the best results, and pay special attention to the edges of any tiles. Other common areas to inspect for cracks and holes include floors, countertops, walls, and even around fixtures.
2. Say Yes to Tile Walls

Are you building a new bathroom or planning a remodel? This is the perfect time to consider waterproofing your bathroom, and what better way to do that than with tiles?
Tiles are amazing due to their moisture-resistant property and their ability to resist the dangerous buildup of mould and mildew. Stone, ceramic, and porcelain are all great options. They also make for easier clean-up and no need to worry about stains and chipping, as you would with paint.
Our shower walls are the most exposed to moisture and water with the daily use of our showers and bathtubs. The use of tiles will hold up much longer and protect your bathroom from water damage.
Lastly, remember that countertop material is also important, as we’re constantly splashing water on them. Unfortunately, PVC or MDF materials aren’t ideal when it comes to moisture. Instead, consider a material like quartz for durability and design.

3. Opt for a Paint Designed for Bathrooms

We deal with Benjamin Moore paints, and they make several types of paint designed for use in kitchens and bathrooms. Their Kitchen & Bath paint is a premium-quality pearl-finish enamel designed to resist mildew growth in kitchens and bathrooms.
If a pearl finish (which has a little bit of sheen and shine) isn’t your thing, try their Aura line. This is Benjamin Moore's ultra-premium bathroom paint—the matte-finish choice for unparalelled colour beauty in high humidity. Personally, I love a matte finish, as it is very forgiving. If your walls aren’t perfect, matte-finish paint will hide the imperfections far better than paint with a shine.
The best advice I can give you is to purchase your bathroom paint from a quality supplier such as Benjamin Moore or Sherwin Williams. Their kitchen and bath line will stand up to the high heat and humidity in a bathroom, and because of the high quality, the painted walls will be easily washable and, in most cases, scrubbable.
4. Waterproof Your Floors
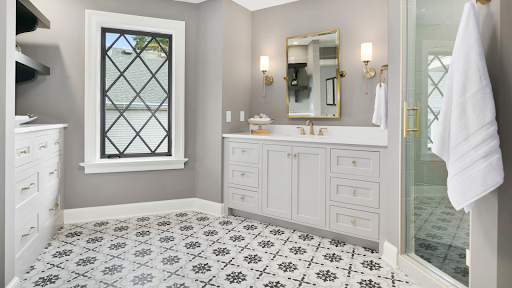
Flooring is an integral part of any bathroom, and we know that design is just as important as function to you. Luckily, you can waterproof your floors while still achieving the look you’re going for.
Porcelain and ceramic tiles are truly the winners when it comes to this department. They come in beautiful designs, colours, and patterns, with so many options to choose from. They’re moisture-resistant, ensuring that you never have to worry about water penetrating into them.
Ensure that if you’re tiling your floors, you want to have a solid subfloor that is screwed down every 6–8" and have your tiler install an uncoupling membrane on top. Both of these steps will minimize issues such as cracking down the road.
If you prefer the look of hardwood or laminate flooring, we have an alternative for you: luxury vinyl floorboard. This type of flooring can give you the wood look while providing you with waterproof features. Luxury vinyl plank flooring comes in so many styles and designs and is extremely durable.
Hardwood, bamboo, and laminate, on the other hand, are materials we suggest staying away from, as they are easily damaged by water and moisture.
5. Don’t Forget About Backer Boards
While you’re going about waterproofing your walls and floors, have you thought about backer boards? They are most definitely something to keep in mind.
Selecting waterproof backer boards will give you peace of mind, knowing that moisture and water aren’t seeping into your walls and causing any sort of damage. It is important to make sure that the backer boards are indeed moisture-resistant.
When tiling your shower or bathtub area, ensure a concrete board type of material is being used as the substrate behind the tiles. You can certainly use concrete board itself, but nowadays there are many far superior products on the market, such as DensSheild and Hardiebacker.
Both of these products are 100% waterproof but have so many advantages over the concrete board from years ago. They can be cut with a knife, are very lightweight compared to concrete board, and don’t create huge plumes of dust when being cut (like concrete board does).
At Multi Trade Building Services, we use DensShield on all of our tiling projects for showers and tubs. We love it because it even has a built-in moisture barrier, and it’s easy to find at many big-box stores.
You also want to ensure that a solid, water-proof shower floor forms the base of your walk-in shower. We use the Schluter system for the shower base and a product called Red Guard to water proof again over top and up part of the walls of the shower. When we are called in either as Home Inspectors or contractors to investigate a leak in a shower, 90% of the time it’s on the shower floor or the bottom 12” of the shower walls because the base was never done properly.
6. Install and Use an Exhaust Fan
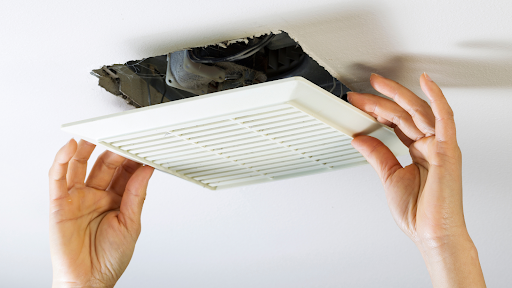
Fans aren’t just for cooling you down on a hot day. Exhaust fans help remove moisture from your bathroom by pushing the moisture out. A high-power exhaust fan is one of the best investments you can make.
Do remember to keep the size of your bathroom and the number of fixtures in mind when considering your options. The larger your bathroom is, the more powerful the exhaust fan you need.
Also, according to the Ontario Building Code, if you have a separate shower and a separate bathtub in your bathroom, you need a minimum 100 CFM exhaust fan. The CFM stands for cubic feet per minute, which is a measurement of airflow volume determined by how many cubic feet of air pass by a stationary point in one minute. We usually recommend that our customers have a minimum 80 CFM exhaust fan in their bathroom, even if they don’t have a separate shower and tub.
The other number you want to consider when selecting an exhaust fan is the sones. Sones are a measurement of sound, and the higher the number, the more noisy your exhaust fan will be. We recommend getting an exhaust fan with 1.0–2.5 sones. Anything higher than 2.5 will be quite noisy, and anything lower than 1.0 will often be so quiet that you might not hear it and forget to turn it off.
To ensure you are using your exhaust fan properly, we recommend you install a 60-minute timer to control your exhaust fan. Turn it on when you first go into the bathroom to use the tub or shower, and just let it run for the full 60 minutes. One of the biggest causes of moisture buildup in bathrooms is that people turn the fan on when they are in the shower and turn it off as soon as they are done. This doesn’t allow the fan to work long enough to remove the moisture.
For more information on exhaust fans and to determine if yours is working efficiently, check out our blog: Is Your Bathroom Exhaust Fan Working Efficiently?
7. Hire a Professional Plumber
Nowadays, DIY projects are very popular, and many of you may enjoy learning that you’re able to get jobs done yourself. That’s great and, of course, very exciting! When it comes to plumbing jobs, however, we suggest passing on the DIY approach and making a call to the pros instead.
Minor mistakes in plumbing can end up costing thousands of dollars in repairs, not to mention the possibility of water infiltrating into your bathroom surfaces. This can quickly lead to many issues, including mould and fungi. If you ask us, the risk is definitely not worth the cost or the stress. Make sure to consult with a professional plumber who has a good track record. With their experience and knowledge, they will be able to fulfill your plumbing needs safely and correctly.
In summary…
You know the drill: if you want to keep your bathroom in top condition, make sure you’ve taken the necessary steps to make it waterproof. That way, you can avoid any moisture-related problems down the road. We hope these tips give you a better understanding of how to guard your bathroom against water damage. Which tip will you be using to keep your restroom dry and cozy?