A Step-by-Step Guide to Labelling Your Electrical Panel
/
The information provided in this blog post is based on our 30+ years of experience in the electrical field. However, if you have questions about the electrical system in your home, please contact the Electrical Safety Authority at 1-877-372-7233. They are the final authority on electrical in Ontario and will have the knowledge, skill, and ability to advise you based on the laws they create.
Labelling our electrical panels is not a job we think about doing. Most of us don’t even realize that we should be doing it or even know how to do it properly! However, this is an important job for any homeowner and should be a priority. We provide you with a step-by-step guide to labelling your electrical panel, along with all of the relevant details you need to know about your electrical system.
Prefer to listen?
Why You Need to Label Your Electrical Panel
Safety

The MOST important reason to label your electrical panel is for your safety and that of your family. In the event of an emergency, when you need to shut off the power to an appliance or receptacle, you need to know which circuit controls it. Seconds can count, and during an emergency, this isn’t the time to start trying to figure out which breaker or fuse to turn off.
I had a scary experience over 20 years ago that made me a staunch advocate of labelling your panel. I had just purchased my first house and planned a Thanksgiving dinner at my new home for my extended family. About an hour after I put the turkey in the oven, I saw flames inside the oven door. Turning the oven off did not resolve the problem. I ran to the electrical panel to shut off the power to my stove, but the panel had never been labelled. I didn’t work for Multi Trade Building Services back then and didn’t know one end of an electrical panel from the other. I eventually figured out which breaker controlled the stove and was able to shut the power down, but not before losing precious minutes. Much more damage to my stove and kitchen occurred because of lost time!
Overloaded Circuits

Another reason for labelling your electrical panel is to identify whether any of your circuits are overloaded. If you’ve ever had fuses blowing or breakers tripping when you’ve had your hair dryer and heater going at the same time, or the toaster oven and coffee maker running together, then you’ve likely got overloaded circuits. There will be more information on this later in this blog.
We often get asked to provide quotes for a higher-amperage electrical panel. When we ask why they want to have a 200-amp panel when the 100-amp panel they currently have should be sufficient, we are most often told that their circuits are always blowing and they are tired of it. However, getting a higher-amperage panel will not solve the problem. This is a problem with an overloaded circuit, which means having to separate the circuits. To learn more about this, read our post, My Fuses are blowing! Should I get a new Electrical Panel?
Renovations
Another huge benefit of labelling your panel is knowing how many items you have on each circuit. Whenever you get any renovations done and require additional electrical items such as pot lights or receptacles, your contractor will need to know which circuits still have room to add them. By providing very thorough panel labelling, you are saving them time and saving you money by not having to pay them to do the panel labelling for you.
Required by Law
The simplest reason to label your electrical panel is that it is an Ontario Electrical Code requirement. The Electrical Safety Authority sets out a clear set of rules and policies to ensure the safety of the public. One of those rules is to have your electrical panel appropriately labelled.
What You Need to Do This Yourself
First of all, you need to understand that this is a two-person job, and it’s going to take between 1.5 and 4 hours, depending on the size of your home. Get a friend, family member, or neighbour to help you, and then you can reciprocate for their electrical panel.
Items You Need on Hand
Night lights, radios, lamps, or electrical testers
Pen and paper
Walkie Talkie or cell phones for each person
Step-by-Step Guide
The first step is to determine where your electrical panel is located, if you aren’t already aware of this. Most electrical panels are in the basement and located near the front of the house. If you see the electrical meter and conduit that are attached to the outside of your house, your panel will be on the other side of that meter. Electrical panels can also be found in garages. If you have a subpanel, you may also find an auxiliary panel in your workshop or shed. These should also be labelled.
Position one person at the electrical panel. Pick a room to start in and position the second person there. Bring the night lights, radios, lamps, or electrical testers with you. It’s usually easiest to start in a bedroom to get the hang of this project.
Select which one of you will be marking down on paper which circuit controls which item. That person should have a pen and paper handy.
Locate all of the receptacles (plugs) and lights in the room.
Turn on all switches and recognize which lights they control. Plug a nightlight, radio, or lamp into each receptacle in the room. If there is a TV, radio, or lamp in the room that is plugged in and functional, turn it on.
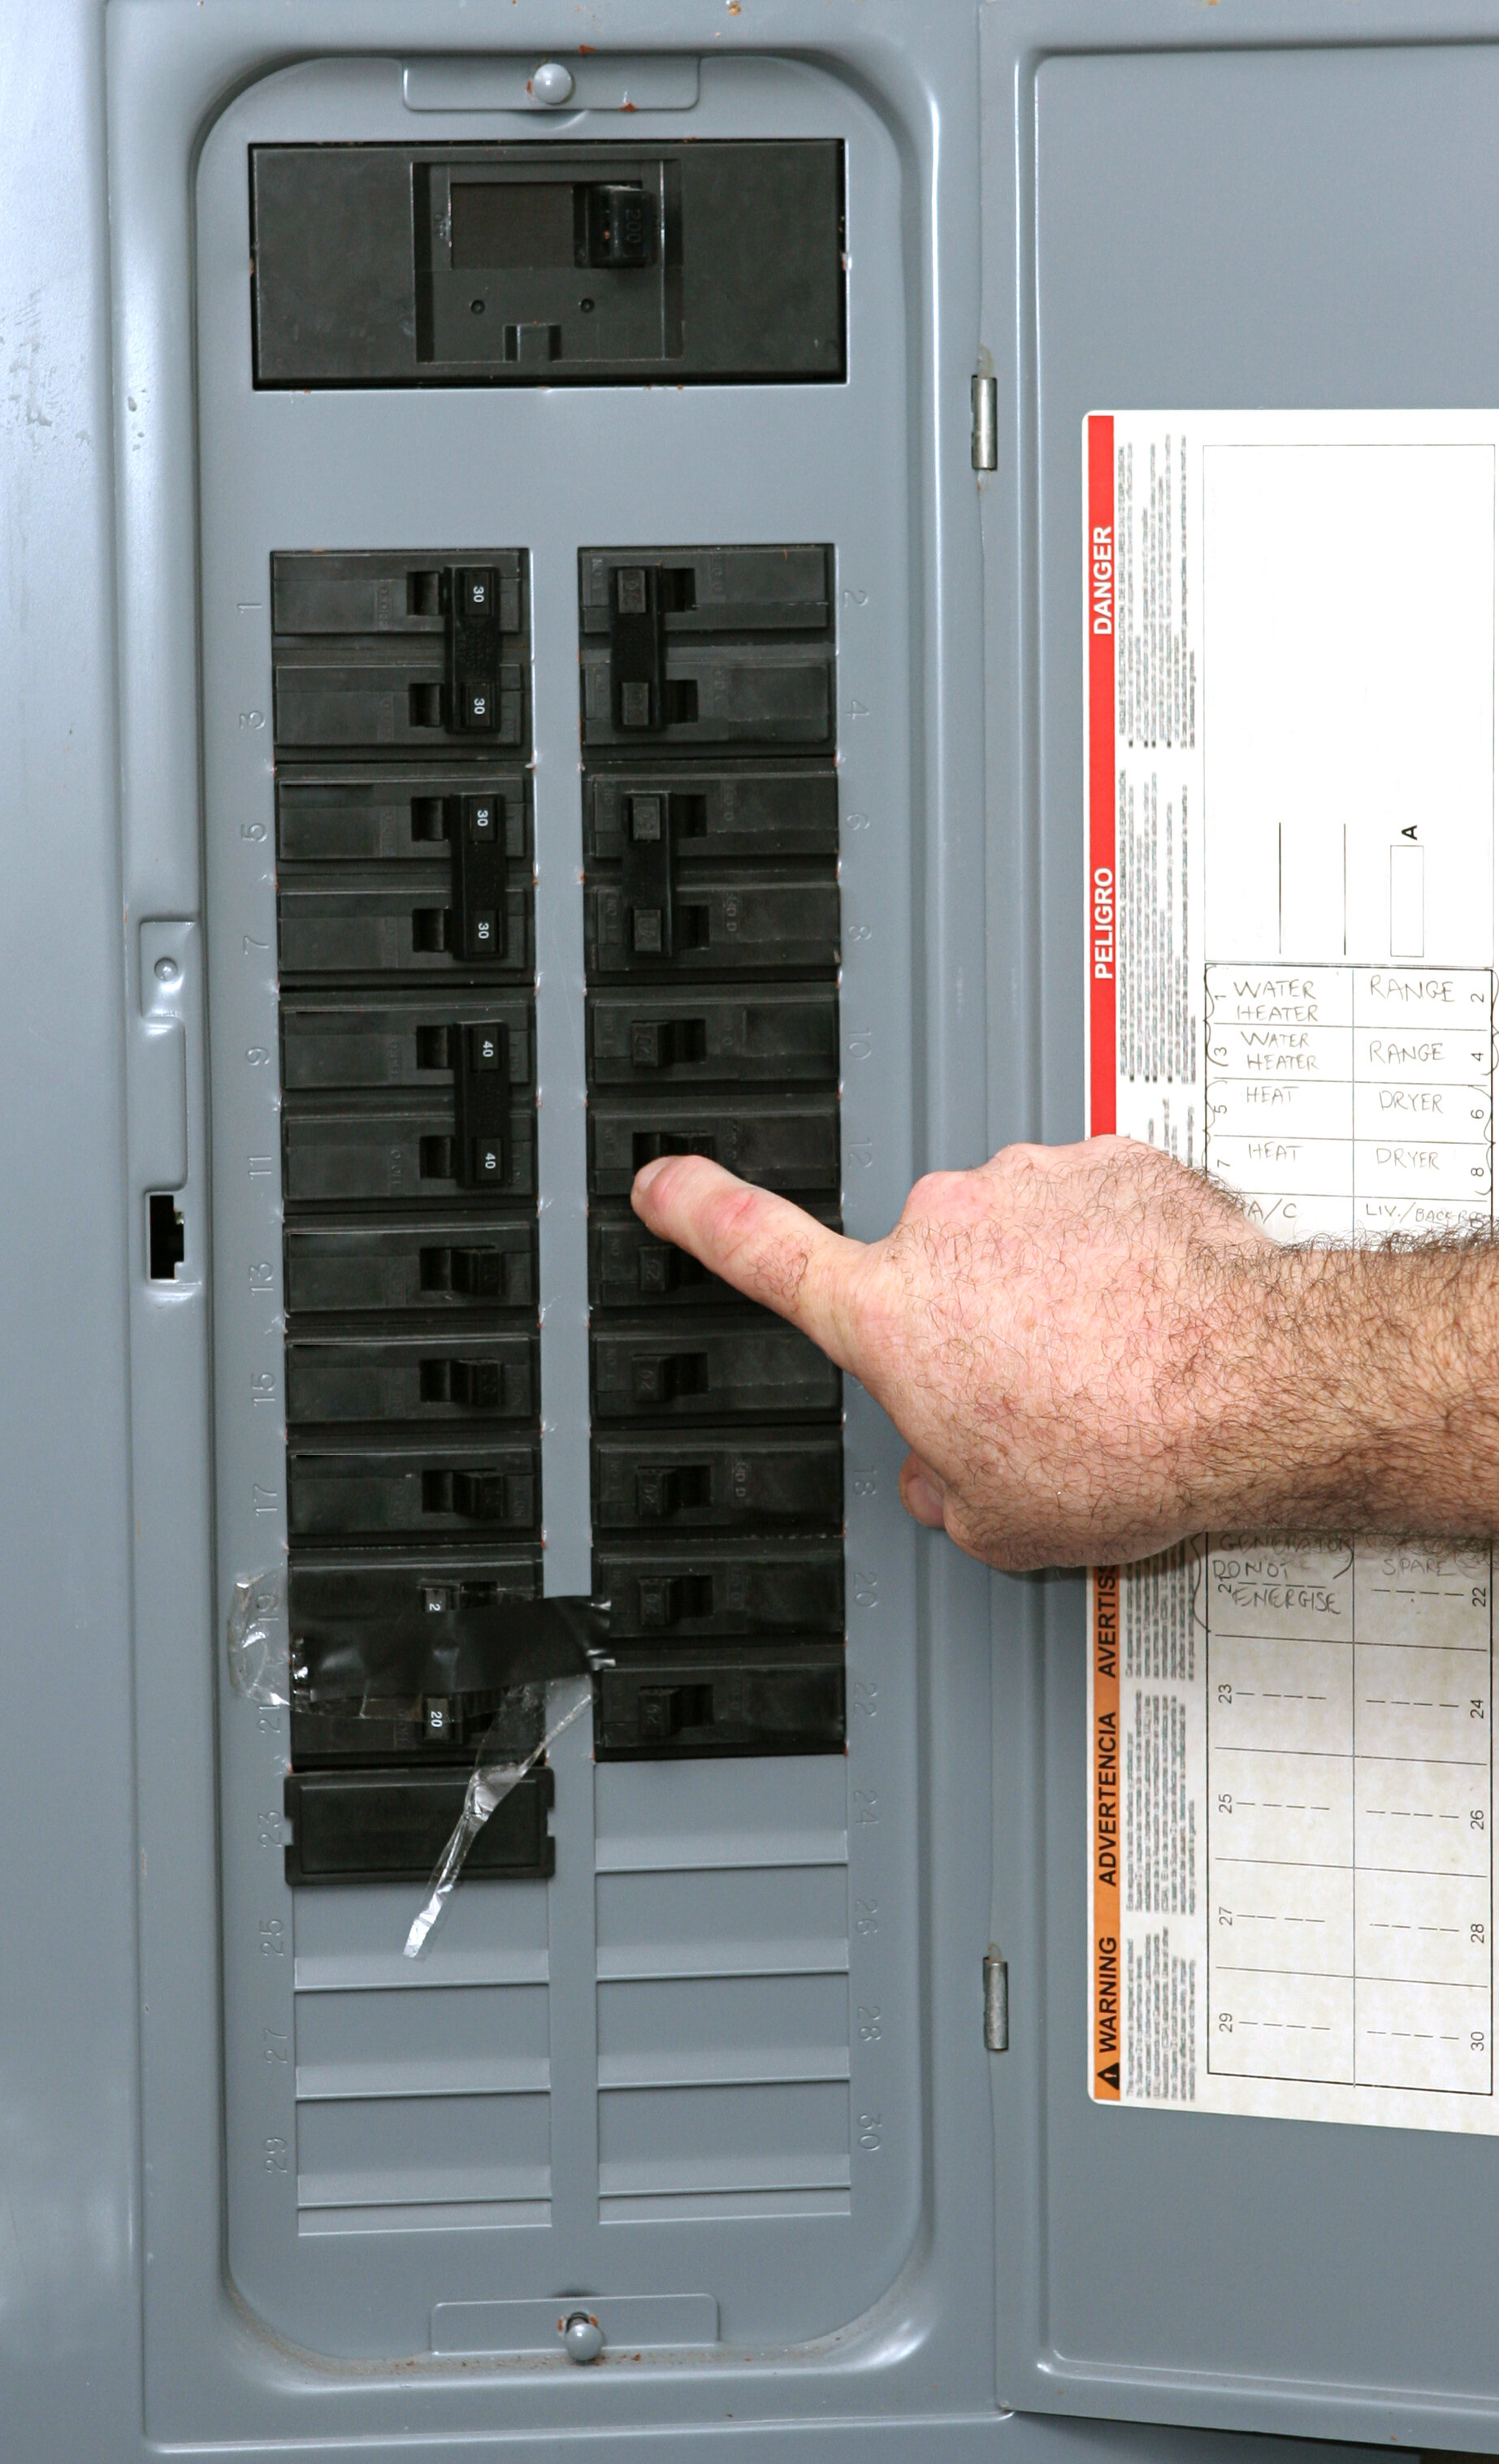
For the person at the electrical panel, ensure all of the breakers or fuses are numbered. If they aren’t clearly marked and numbered, use a permanent marker such as a Sharpie and assign a number to each breaker or fuse right on the metal part of the panel.
Call each other on cell phones or walkie-talkies.
Starting methodically at the panel, start turning the breakers off or unscrewing the fuses one at a time. Slowly turn the breaker off and then turn it back on again. Unscrew the fuse, wait 2-3 seconds, and then screw it back in again. Be careful when doing this. Ensure you flip the breakers firmly, not aggressively, and screw the fuses back in squarely and fully.
For the person monitoring the room, watch for lights, TVs, radios, etc. to turn off. As soon as something in the room turns off, let your partner at the panel know to stop. Ask to have the breaker or fuse turned back on and off again to confirm that it controlled the receptacle or light you saw turn off. Once you have confirmed that, ask what circuit number that was.
The person who will be recording the findings should now write down the circuit number and clearly identify the location and item that were identified. This needs to be very specific and generic. Do not identify rooms as Julie’s bedroom or the blue bedroom. Julie could move out, and the paint colour may change over time. You need to generically identify the room geographically as well as the location of the item. For example, if you determined that a particular receptacle in the bedroom you are in is controlled by circuit 2, you could write the following: Breaker #2: Receptacle on the west wall in the SE bedroom on the second floor
Continue following the above steps for every room in the house. Please remember that in some older homes, switched receptacles exist. That means that the receptacle is only functional when the switch is in the on position. Don’t forget to do the exterior receptacles and lights, as well as the garage and any sheds that have electrical.

Tips for Labelling the Items in Your Kitchen
To determine the circuit for your fridge, open the door of the refrigerator. The light in your fridge should be on. When the light goes out, that should be the circuit that controls it.
Most stoves have LED displays on their clocks. Use that as a reference. When the LED display goes dark, that’s the circuit that controls it. You can also open the oven door, ensuring the light is on. When the oven light goes out, that’s the circuit that controls it.
For your dishwasher, turn the unit on to run a short cycle. Once it turns off, you’ve found the circuit.
To determine which circuit controls the microwave, watch for the LED display to turn off.
For the outlets in your kitchen, most should be split receptacles, which means there are 15 amps going to the top half and 15 amps going to the bottom half. Make sure you test the top and bottom halves to ensure they are on the same double-pole breaker.
To test the circuit for the garburator, turn the garburator on with the water running. When the garburator turns off, that’s the circuit that controls it.
To identify the circuit that your wine fridge is on, watch for the LED displays that are normally found on wine fridges to go dark.
Tips for Labelling Your Bathroom Items

The items that need to be tested include: all lights, the Ground Fault Circuit Interrupter, or GFCI (the bathroom receptacle), the exhaust fan, floor heat, towel warmers, and whirlpool or air jet tubs. To test the tubs, fill them up past the jets and turn them on. Once they shut off, that’s the circuit that controls them.
Turn your exhaust fan on, and when it turns off, you’ve found the circuit. The GFCI can be tested the same way you’ve tested other receptacles in the house. While you are testing it, make sure you 'test' the GFCI for function. Press the button on the receptacle to shut it off, and then press the other button to reset it. If it’s not functioning properly, consider replacing it with a new one.
What Exterior Items Need to be Identified
Garage: receptacles, overhead lights, garage door opener, central vacuum system
Exterior receptacles and lights. Lights are often located at all entrances and exits to the house and at the garage.
All receptacles and lights within a shed
Hot Tub
Pool pumps and pond pumps
What Items Should be Identified in Your Basement
Freezers
Additional/Beer Fridges
Wine Fridges
Sump Pump
Water Softener
Hot Water Tank
Furnace
Washing Machine
Dryer
Interconnected Smoke Detectors
Fireplace Blower
Now What Should I Do With All of This Information?
Once you have a complete list of all of the electrical items in your home and which circuit controls each one, we recommend you type up the list in chart form. To see a sample panel label chart that we actually did for a client of ours, click here. In this sample, we even marked on the chart which circuits had deficiencies or problems that should be addressed. You will also see that this client had a subpanel that was separately labelled here.
Once you have the panel label typed up, we recommend printing off two copies. One copy should be put on the wall near your electrical panel for reference. The other copy should be filed away where you keep important documents. We also recommend printing one off in a smaller font so that it fits right on the cover of the panel.
Do You Have Any Overloaded Circuits?
There are several items in your home that should have dedicated circuits. This means that these items should be the ONLY items on a particular breaker or fuse. If there are other items that you found to be on that same circuit, this is considered an electrical safety code violation and should be corrected by a Licensed Electrical Contractor. For example, if circuit #7 has your washing machine and five receptacles on it, it is an overloaded circuit, and the washing machine should be separated on its own circuit.
The items that should be on their own circuit include:
Stove
Fridge
Dryer
Washing Machine
Dishwasher
Sump pump
Hot Tub
Microwave
Kitchen Counter Receptacles
Central Vacuum
Pool Pumps
Freezers
Some Wine Fridges
Furnace
Garburator
Specialized Workshop Equipment
Some Fireplace Blowers
Air Jet or Whirlpool Tubs

In addition to the several items that should be on their own circuit, no circuit (that doesn’t have dedicated items on it) should have more than 12 items on it. For example, you could have a total of 5 lights and 7 receptacles on a circuit, but if you had 10 receptacles and 8 lights, that circuit would be overloaded. This situation can cause fuses or breakers to trip, which is a dangerous electrical situation. Contact a Licensed Electrical contractor to rectify this deficiency. Multi Trade Building Services is a Licensed Electrical Contractor (License #7005727).

We hope this step-by-step guide has provided you with enough information to efficiently label your electrical panel. However, if you would be more comfortable having a Licensed Electrical Contractor complete this project for you, we’d be happy to help residents of Durham Region or Clarington. For more information and to contact us, click here.